DIY outdoor kitchen build path
Build Your Own Outdoor Kitchen
A practical step-by-step route for deciding what to DIY, planning the layout, checking permissions and services, and preparing the ground before you build.
A good DIY outdoor kitchen starts long before the first block, cabinet or grill goes in. The safe order is to decide what you are comfortable doing yourself, design the workflow, check planning and services, then make sure the base can handle the weight, weather and drainage.
Current series stageThis hub starts with the decision process. The next articles can expand each stage into a detailed build guide.
Best forUK homeowners planning a fixed or semi-permanent grill, worktop and storage zone.
Use beforeOrdering appliances, trenching services, pouring a slab, or building blockwork.
Step 1
To DIY or not to DIY?
DIY makes most sense when you are building a simple, accessible kitchen on a sound patio or prepared base. Bring in trades when the design involves gas, new electrics, drainage, heavy foundations, structural shelter, or any work where a mistake could become unsafe or expensive to undo.
Good DIY candidate
Simple build on a stable base
- Existing level patio, concrete slab or compacted sub-base.
- Freestanding or modular cabinets with a built-in or cart-style grill.
- No new gas line, mains electrical circuit, drainage or roof structure.
DIY with trade help
You can build, but outsource the risky parts
- You assemble cabinets, frame non-structural sections or fit doors.
- A qualified electrician handles outdoor power and RCD/GFCI protection.
- A Gas Safe engineer handles fixed gas pipework and appliance connection.
Get professional input
Structure, services or uncertain ground
- Pergola footings, retaining walls, raised decks or heavy masonry runs.
- New water, waste, electricity, lighting circuits or permanent gas supply.
- Sloping, soft, poorly drained or recently disturbed ground.
What you need to be ready for
- Clearing and measuring the area accurately.
- Checking levels, drainage fall and finished floor height.
- Planning appliance clearances, ventilation and heat-safe surfaces.
- Moving heavy materials without damaging paving or injuring yourself.
- Keeping the build weatherproof while it is part-finished.
Budget for more than the visible kitchen
- Base preparation, drainage, skips and waste removal.
- Outdoor-rated fixings, sealants, vents and access panels.
- Tool hire such as a compactor, mixer, masonry saw or laser level.
- Professional checks for gas, electrics, water and structural work.
- A contingency for awkward cuts, extra materials and weather delays.
Quick tool reality check
For a light modular build, you may only need a tape measure, level, drill/driver, masonry bits, clamps, spanners, silicone gun, PPE and basic hand tools. Groundworks or masonry can add a compactor, mixer, grinder, masonry saw, string line, shovel, wheelbarrow and dust control. If you need a tool for one risky job, price professional help before buying or hiring it.
Step 2
Plan and design the layout
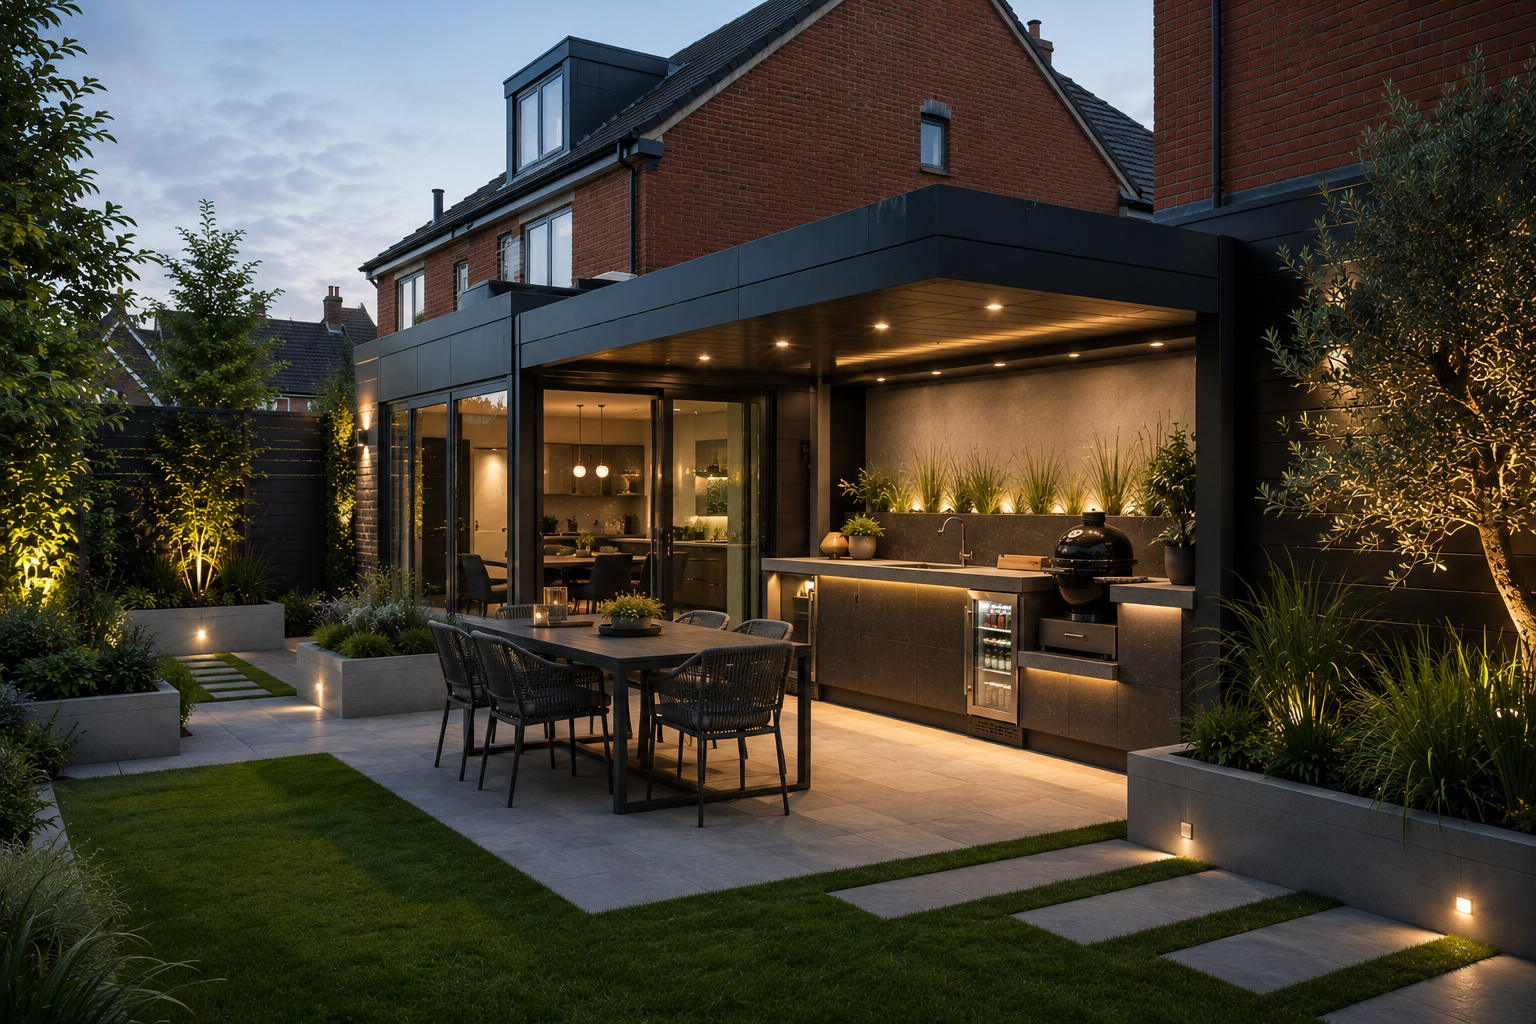
Decide how the kitchen will work before choosing appliances. Map the route from indoor kitchen to outdoor prep, cooking, serving, seating and clean-up. Keep the cook included in the social space without putting guests directly in the heat, smoke or traffic path.
Measure the usable footprintAllow space for cabinet depth, open doors, grill lids, safe circulation and serving.
Pick the cooking centreGas, charcoal, pellet, electric and pizza ovens all need different clearances, storage and ventilation.
Protect prep spaceA stretch of clear worktop beside the grill is often more useful than another appliance.
Step 3
Organise planning permission and services
Many open, low-level outdoor kitchens are straightforward, but roofed structures, boundary builds, raised platforms and listed or designated properties deserve a proper check. Services also need early planning: water needs winter isolation, waste needs a legal route, outdoor electrics need protection, and fixed gas needs qualified installation.
Step 4
Groundworks and foundation
The foundation has to suit the kitchen weight, ground conditions and any shelter. A light modular kitchen can often sit on a sound patio. Heavy blockwork, stone, concrete worktops, pergolas or soft ground may need a new slab, reinforced base, strip footings or individual pad footings.
Existing patio
Good for light modular units if it is level, stable, well drained and not rocking or sinking.
Concrete slab
Useful for heavy or permanent builds, provided it has the right depth, reinforcement, fall and sub-base.
Footings and pads
Needed where posts, pergolas, masonry returns or localised heavy loads must transfer weight safely.
Series plan
Next articles to build out
This hub can become the front door for a full DIY series. Use these subpages as the main DIY build sequence.
1. DIY Outdoor Kitchen BudgetStage-by-stage costs, merchant price ranges, services, contingency and worked examples.
2. Outdoor Kitchen Layout and MeasuringMeasure the garden, map the workflow and set clear dimensions before you buy units, timber, worktops or appliances. A good layout budget starts with real space, clearances and service routes.
3. Choosing Materials for a DIY Outdoor KitchenChoose materials that can survive UK rain, frost, UV, grease and repeated cleaning. The cheapest indoor kitchen material is usually the expensive mistake outdoors.
4. Creating the Frame for a DIY Outdoor KitchenBuild the frame square, level, ventilated and serviceable. The frame sets the finished line for doors, worktops, appliances and cladding, so small errors become visible later.
5. Running Utilities to a DIY Outdoor KitchenPlan power, lighting, water, waste and gas before the frame is closed. Utilities can make an outdoor kitchen more useful, but they are also where safety, regulation and budget matter most.
6. Weatherproofing a DIY Outdoor Kitchen for the UKDesign for rain, frost, wind, UV and damp air from the start. UK weatherproofing is not one product; it is drainage, ventilation, material choice, covers, detailing and maintenance.
7. Outdoor Kitchen Worktops and FinishesThe worktop and finish decide how the kitchen feels day to day. Choose surfaces that can handle heat, grease, frost, sun, cleaning and the occasional wet pan.
8. Outdoor Kitchen Lighting and SeatingFinish the kitchen by making it safe to cook in and comfortable to sit around. Lighting and seating turn the build from a grill station into a usable outdoor room.