DIY build step 2
Outdoor Kitchen Layout and Measuring
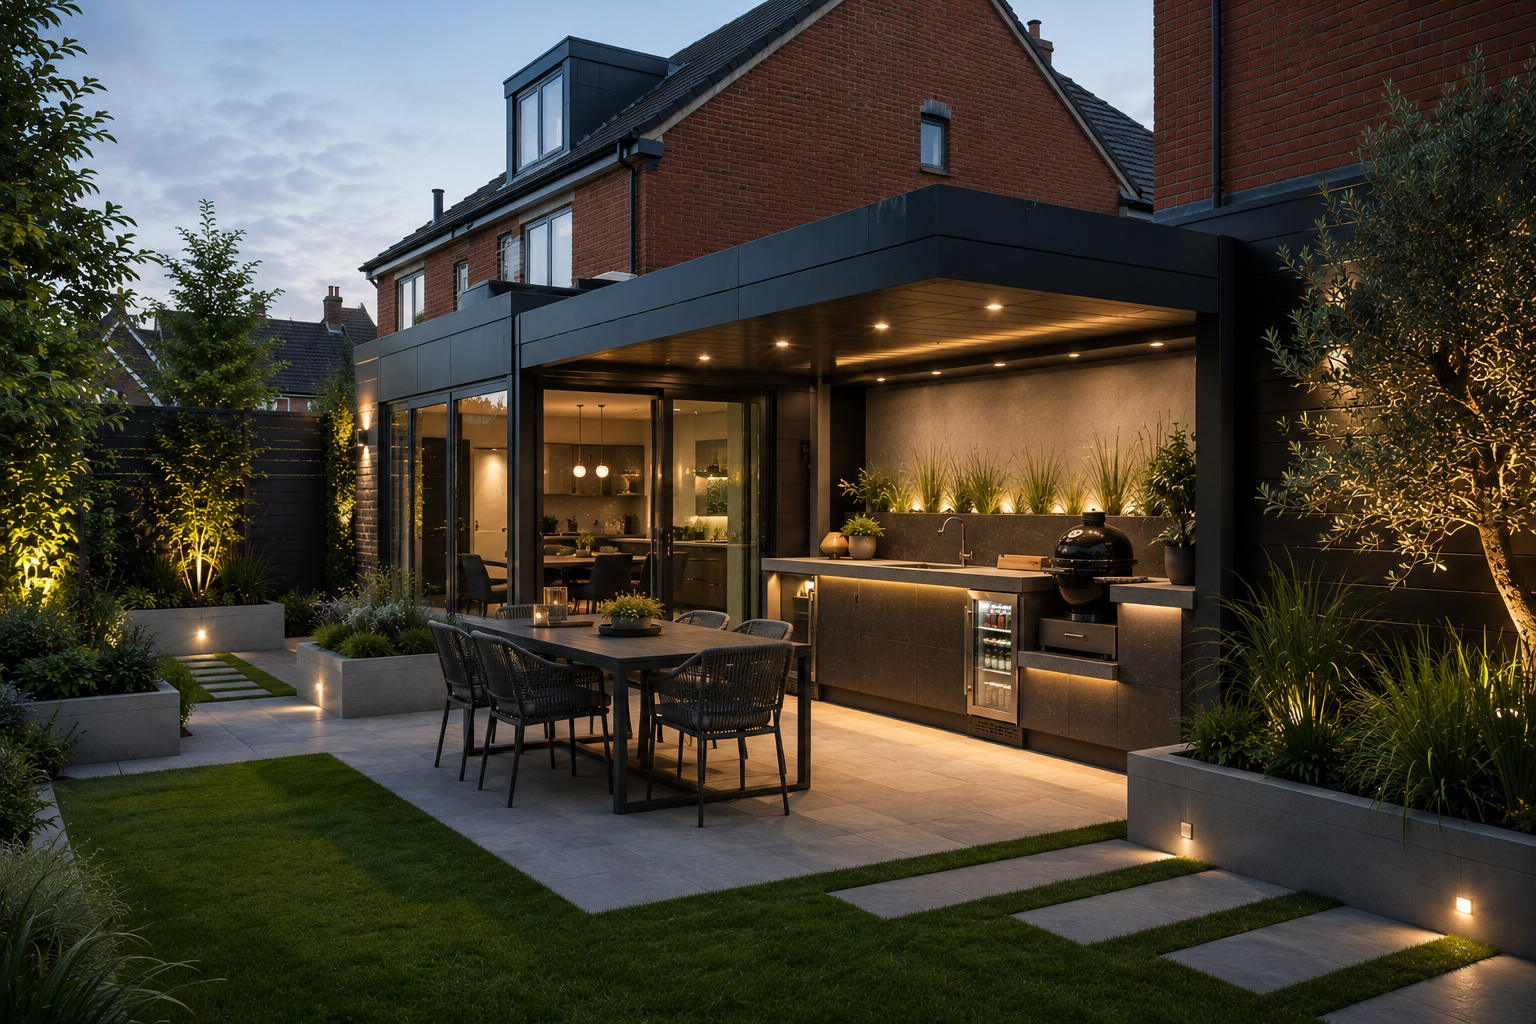
Measure the garden, map the workflow and set clear dimensions before you buy units, timber, worktops or appliances. A good layout budget starts with real space, clearances and service routes.
Measure the garden, map the workflow and set clear dimensions before you buy units, timber, worktops or appliances. A good layout budget starts with real space, clearances and service routes.
Measure first
Measure first
Record the wall, patio, slope, doors, windows, boundaries and drain positions before sketching the kitchen.
Protect workflow
Protect workflow
Plan the route from indoor kitchen to prep, cooking, serving, seating and clean-up.
Allow clearance
Allow clearance
Leave safe lid opening, hot-zone space, door swings and a comfortable standing area for the cook.
Step 1
Measure the site like a builder, not like a furniture shopper
Start with a simple scale sketch. Measure the total patio or garden area, then mark the house wall, fences, steps, doors, windows, inspection covers, drains, existing sockets, outside taps and changes in level. Note where rainwater currently runs because the kitchen should not block drainage or push water toward the house.
Measure width, depth and height in millimetres.
Mark anything that cannot move, including drains and air bricks.
Take diagonal measurements if the patio is not square.
Photograph the area with a tape measure visible for later checks.
Step 2
Set cooking, prep, serving and seating zones
Outdoor kitchens work best when each zone has a job. Put the grill where smoke and heat can escape, keep prep beside the cooking area, and place seating close enough to feel social but not in the hot zone. If the kitchen is near the house, leave room for people carrying trays in and out.
Keep useful worktop on at least one side of the cooker.
Avoid putting the cook with their back to every guest.
Do not route foot traffic between the cook and the grill.
Keep bins, fuel and cleaning kit reachable but not visually dominant.
Step 3
Check clearances before choosing appliances
A grill that fits on paper may still fail if the lid hits a pergola beam, the doors cannot open, or the heat zone is too close to fencing. Check the appliance manual before finalising dimensions, especially for built-in gas grills, pizza ovens and side burners.
Allow lid-opening height and rear clearance.
Leave safe space from combustible fencing, cladding and pergola posts.
Keep appliance vents unobstructed.
Plan access panels for gas bottles, isolation valves and maintenance.
Step 4
Sketch service routes before the layout is locked
If you want power, lighting, water, waste or fixed gas, draw the route before building the frame. Straight, accessible runs are cheaper and easier to inspect. If a service route crosses a new slab or patio, decide whether it needs conduit, ducting or a different kitchen position.
Keep outdoor sockets and switches away from splash and heat zones.
Leave access to isolation points.
Avoid burying junctions or valves inside finished cladding.
Plan drainage before adding a sink.